The earliest quilting was done not for bed coverings, but for clothing. The layers of fabric and padding stitched together gave garments protection and warmth. As quilting evolved, it began to be used as bedcoverings. The earliest quilted bedcoverings were typically made of large pieces of cloth and called “whole cloth” quilts. By the 1830s, though, pieced quilts used on beds were becoming more popular. These quilts often incorporated depictions of current or local events into the design. Many people began to see designing and sewing quilts as a way of commemorating events, showing off their needlework skills and keeping busy. It certainly could be a practical use of fabric, but some quilt experts today also note that quilting was perhaps more commonly seen as a socially acceptable pastime, even on Mackinac Island.
When Mackinac Island merchant Edward Biddle died, nine quilts were listed in his probate records. We have some idea of the patterns used for these quilts are based on letters exchanged between Edward’s daughter Sophia and her cousin in the Detroit area. These letters mention Irish double chains and star pattern quilts. There were many different types of star pattern quilts around by the time these letters were written, so we will probably never know the specific one Sophia had chosen.
We have chosen a common and simple square from the 19th century for you to take a stab at and make yourself. Piecing and sewing can be a creative and satisfying way to connect to the past. Try your hand at this “star pattern” quilt square. Be sure to share a picture of the finished product with us on Facebook!
Pattern:
You will need:
– Scissors
– Sewing thread
– Sewing needle
– Two colors of fabric
– Backing fabric (about 12” square, at least) 2.5” strip of fabric for binding the edge or pre-made tape
– Ruler or other measuring tool
Notes: Be creative when you are gathering supplies. If you don’t have quilt batting, try using an old towel, layers of scrap fabric or anything else that you might have around the house. It is sometimes a good idea to work your pattern out with paper. You can play with the layout and may even end up creating your own unique design.
Step 1: Cut out four squares from your first color that measure 4.5” square, and one that measures 5 3/8” square. These will be your background pieces.
Step 2: Cut out three squares from your second color that measure 5 3/8” square and one that measures 4.5” square. These pieces will make your star.
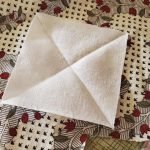
Step 3: Cut your larger squares into four equal triangles. Draw or press lines into them from corner to corner to get straight lines.
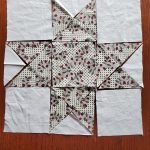 Step 4: Arrange your pieces into a star pattern with the main fabric square in the center and the background color around the edges.
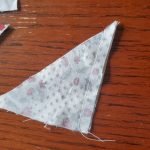 Step 5: Piece your block together using ¼” seam allowance. Press each seam open as you sew.
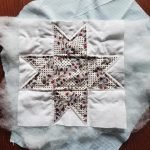 Step 6: Layer your quilt block, filling material and back together and baste, baste, baste!
Step 7: Quilt your block! Stitch along the seams or use your own pattern.
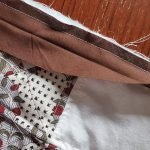 Step 8: Trim the block to cut away any unevenness and bind the edges.
Step 9: Consider adding the year and maker to the block with ink or thread.
Step 10: Admire your work and send us pictures of your finished quilt block.
